
Understanding Interface Tables in Maximo
Navigating the Integration with Maximo's Interface Tables for Efficient Data Exchange.

Hi folks, I am Vivek, an IBM Maximo Developer. I just started to share Maximo's knowledge. Whatever I learn and whatever I have, I will encourage your support.
In this post, I will explain the power of interface tables in Maximo for seamless data integration to integrate and manage data from diverse sources. These interface tables act as staging areas for data that needs to be transmitted to external systems or applications. The process involves populating these tables with the relevant data and configuring Maximo's integration framework to export the data to external systems.
These tables play an important role in the data integration process, allowing organizations to efficiently import, validate, and transform data from external systems.
Here's a step-by-step guide on using interface tables to send data outside Maximo:
Identify data needs to be sent out from the Maximo.
Configure the component in Maximo.
Create an Interface Table.
After getting all the business requirements that this attribute data needs to be sent from the Maximo application to the XYZ application in order to populate that record entry in other applications when ever an event triggers in Maximo.
The following components need to be configured in Maximo.
Object Structure
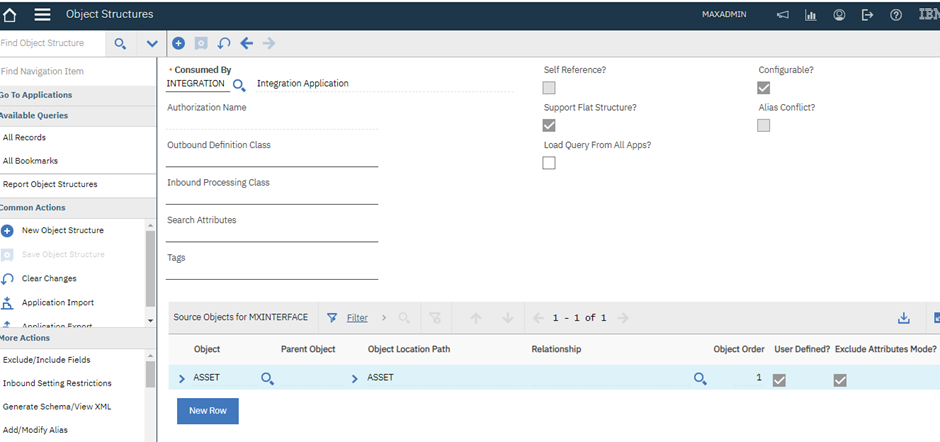
Object structure is a fundamental concept that plays a crucial role in data integration and mapping. In this example, we were going to create the interface table for the asset table. So we were creating the asset table object structure by including and excluding fields and attributes that we were not required to send in our asset interface table.
Navigate to the Object Structure application and create an object structure consumed by integration, which determines whether this object structure is going to be used for integration purposes. Select the source object as an asset from the lookup list and click on exclude attribute mode in order to select the attribute that needs to be sent out from Maximo. that only get stored in the newly created interface table.

Click on the Exclude or Include fields from the More Action in order to select the attributes from the asset table.

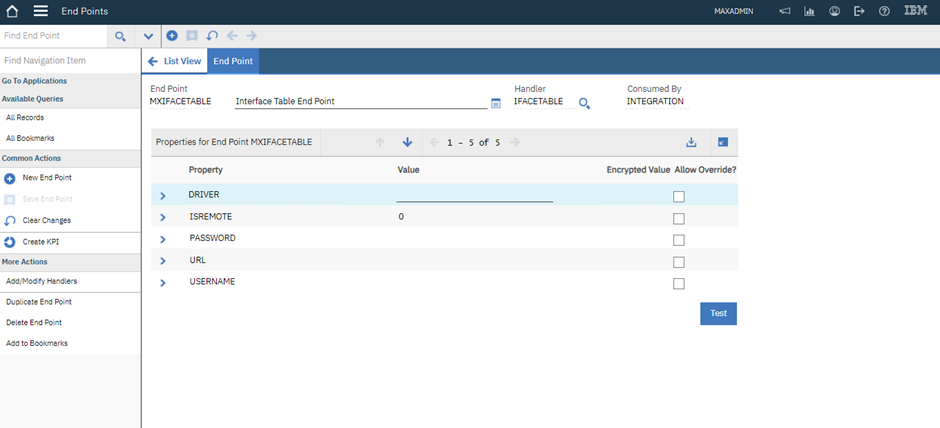
End Point
An endpoint is a URL that specifies the location of a web service or external system that Maximo communicates with. Endpoints are crucial components in the integration capabilities of Maximo, enabling the exchange of data between Maximo and other systems.
So here in this blog, we are taking advantage of the OOTB end point, namely MXIFACETABLE. If we set remote 1, then we need to provide another property value. If it’s 0, then it indicates that the interface tables are available in the local database in the system schema.
IBM Document for the Property Value

Publish Channel
The Publish Channel is a component that facilitates the outbound publishing of business data from Maximo to external systems or applications. Publish channels play a crucial role in real-time data synchronization and enable Maximo to share relevant information with other systems in the enterprise system.
So we will provide the object structure that we have created in the first step and provide the publish channel rule if required as part of the business requirements.

Under More Action, there were two actions.
Enable Event Listener: Enabling an Event Listener for a Publish Channel allows you to trigger outbound data publishing based on specific events or conditions within Maximo.
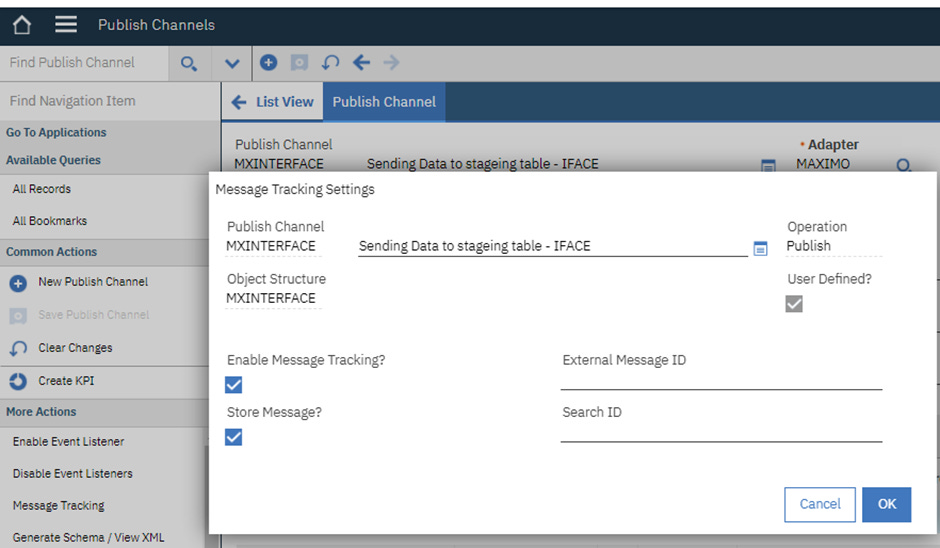
Message Tracking: This action is valuable for ensuring the reliability, integrity, and performance of data being published from Maximo.

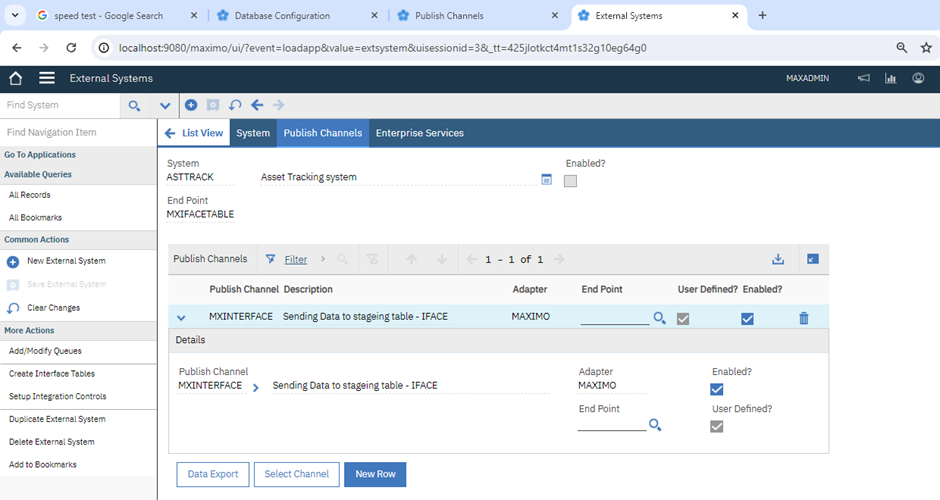
External System
Create a custom external system by configuring the correct end point, which we have created as part of this blog, and configuring the JMS queues sqin/sqout and cqin in the external system that we have created.

Navigate to the Publish Channel application and attach the Publish Channel that we have created and enable it.

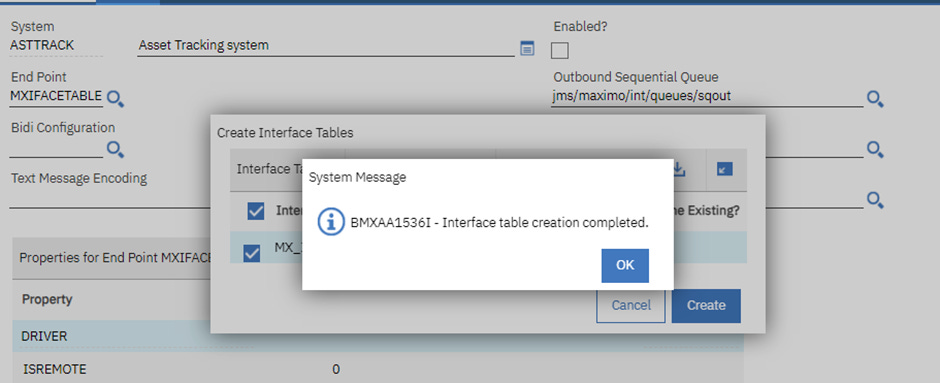
Select the create interface table under the more action in the external system, check on the given option, click on the create button, and wait until the system prompts.


Now the new maximo table is created in the database since we have selected remote property value 0 in the endpoint. We do not require any kind of admin mode to be on and do not need to run a config DB action.


Test Time
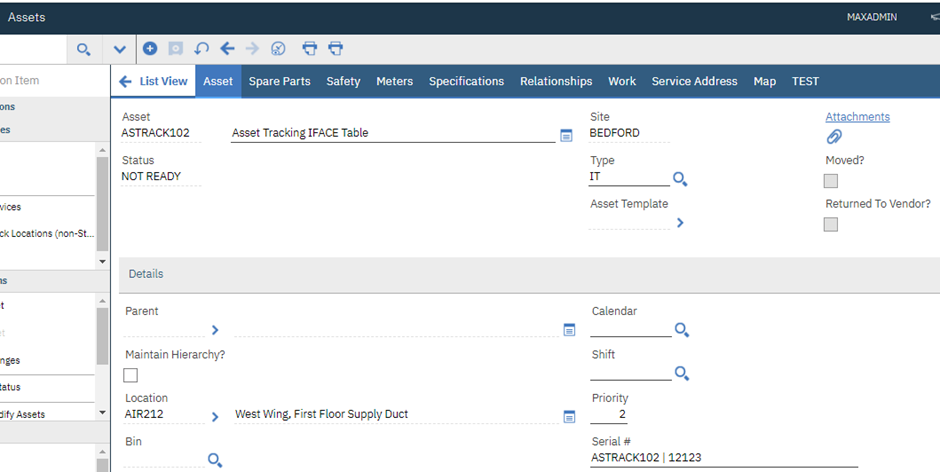
Navigate to the Assets application and create or update any asset record in the Maximo Assets application.
We will check if any entry marked in message tracking is marked or not for the same asset since, in the publish channel, we have selected enable message tracking.
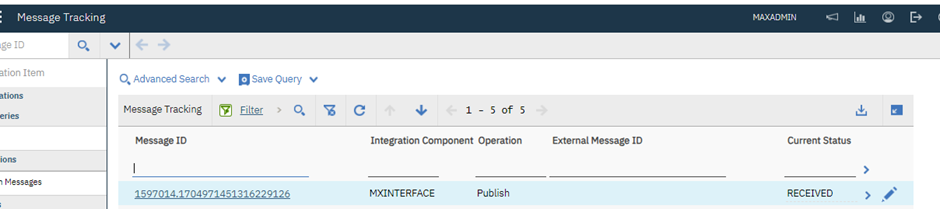
As we can see, we received the entry from our integration control. If we open and check, we will get the XML definition of the date we feed into the asset application.
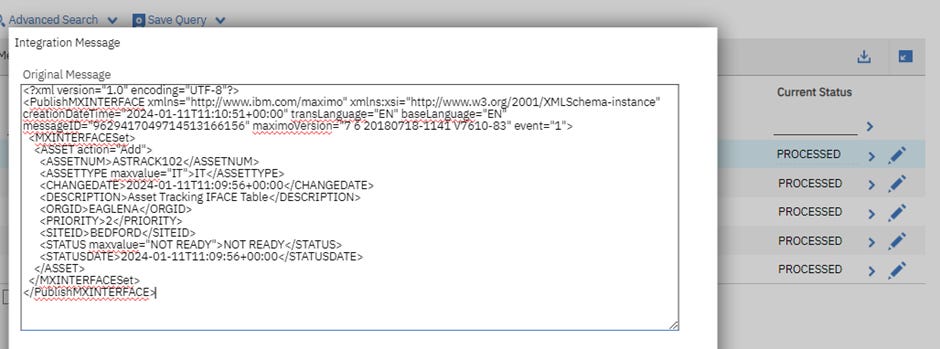
After all system validations, this data gets processed and stored in the newly created interface table, which we can then check in the database table.

In conclusion, interface tables in Maximo empower organizations to streamline their data integration processes, providing a robust framework for importing, validating, and transforming data. As organizations navigate the complexities of enterprise asset management, the role of interface tables becomes increasingly pivotal in maintaining data accuracy, integrity, and consistency.


Thanks for sharing valuable information.
But I think we should reload JMS Crontask and make sure it's enabled to process synchronizing our data to the DB table.